Introduction
Implementing SAML Authentication for Simplelists is described below. If you use the Automatic Method you can ignore the Manual Method.
- Create Microsoft ADFS Relying Party Trust for simplelists (Automatic Method)
- Create Microsoft ADFS Relying Party Trust for simplelists (Manual Method)
- Create Microsoft ADFS Claims Issuance Policy for simplelists
- Add Signature Verification Certificate for Microsoft ADFS Relying Party (Manual Method)
- Set simplelists user to use the SAML Provider
- Testing Login
Create Microsoft ADFS Relying Party Trust for simplelists (Automatic method)
Creating an ADFS Relying Party Trust with the Simplelists metadata
- Transfer the saml.xml file, downloaded from the Simplelists Authentication Settings, to the ADFS server
- Open the AD FS Management application
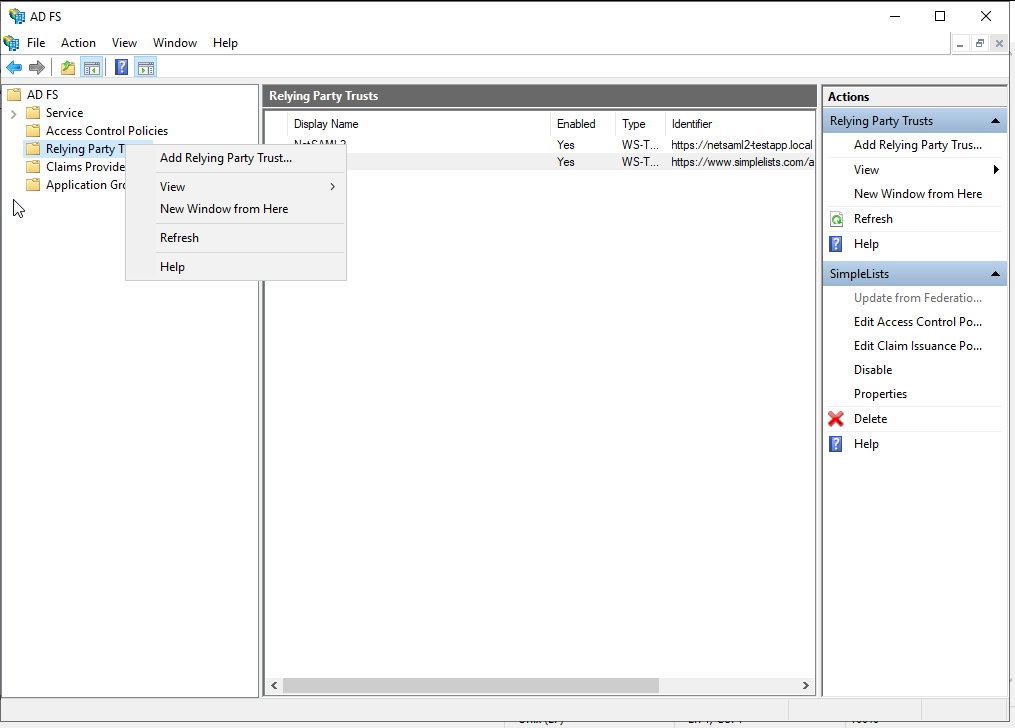
- Right-Click on the Relying Party Trusts Folder
- Click Add Relying Party Trust...
Relying Party Trust Wizard
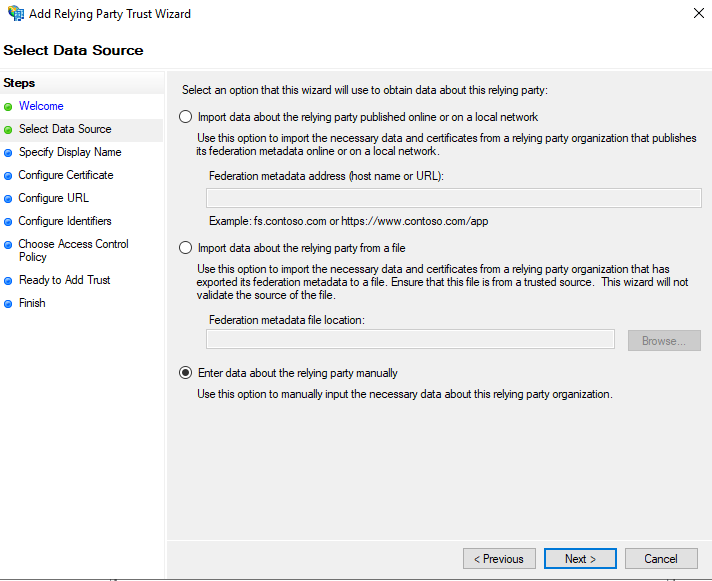
Select Data Source
- Select the Import data about the relying party from a file
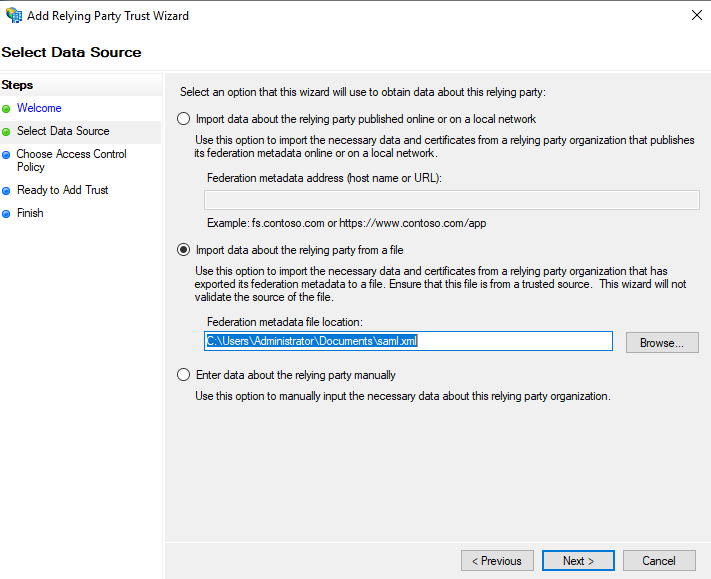
- Click the Browse button and locate the saml.xml file
- Click Next to continue
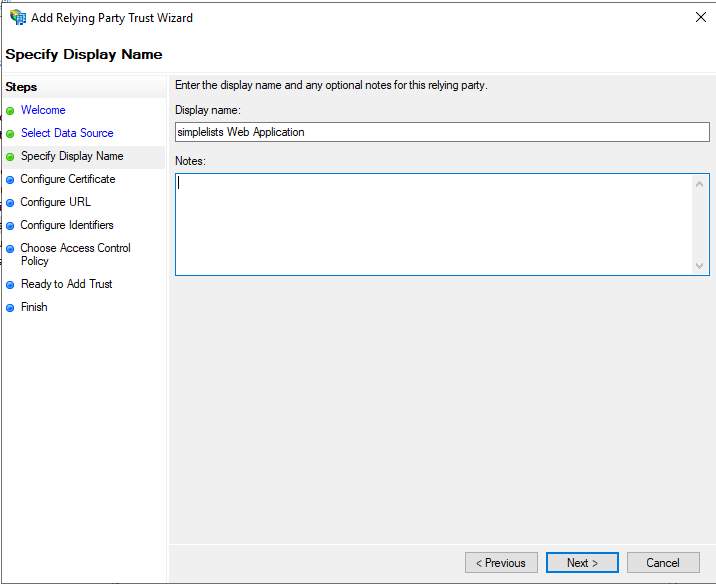
Specify Display Name
- Enter a Display Name to distinguish the Simplelists application
- Enter a Description (Optional)
- Click Next
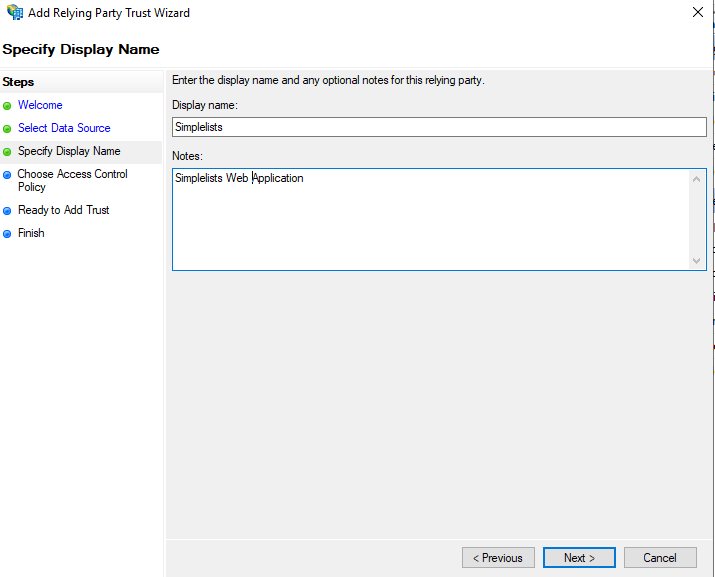
Choose Access Policy
Ready to add trust
Finish
Set Response and Assertion Signing option
Simplelists metadata is configured to support Encrypted Assertions. This means that the XML will be encrypted by ADFS using the Simplelists public key certificate. This provides additional security but requires an additional option to be set via Powershell.
- Open Powershell
- Run the following command
Set-ADFS-RelyingPartyTrust -targetname SimpleLists -SamlResponseSignature “MessageAndAssertion”
Create Microsoft ADFS Relying Party Trust for simplelists (Manual method)
- Open the AD FS Management tool
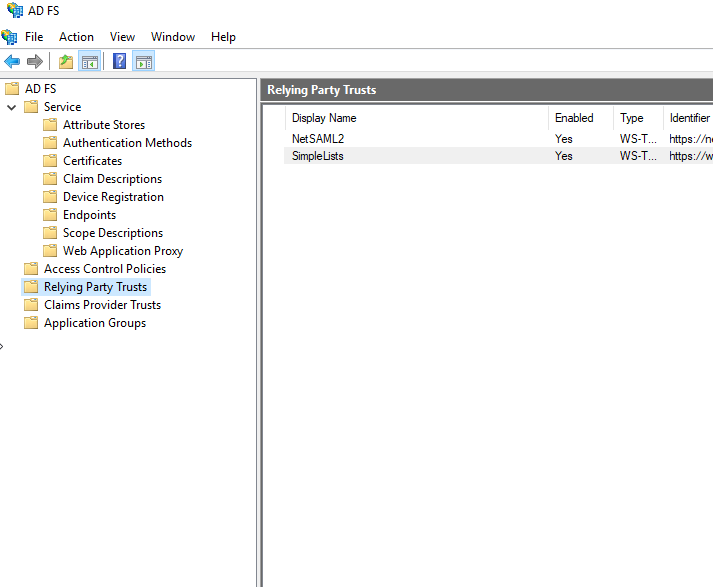
- Select Relying Party Trusts
- Right click and select Add Relying Party Trust …
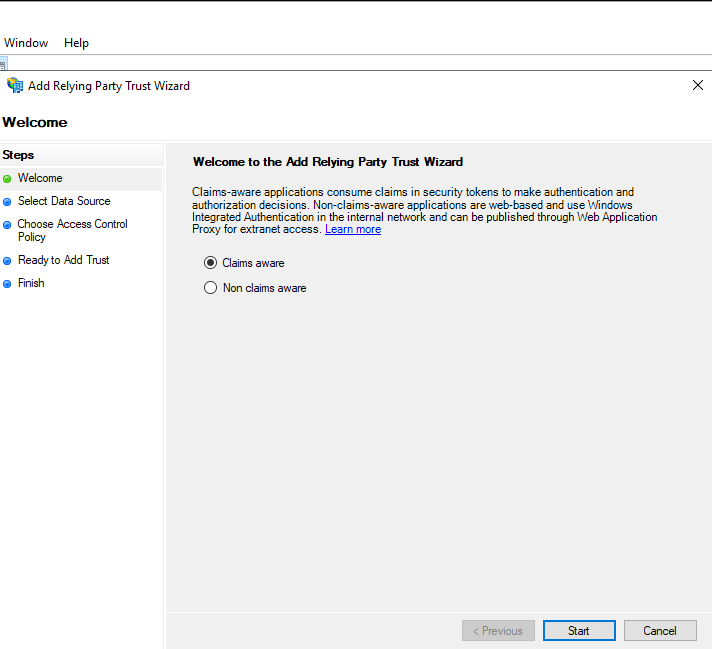
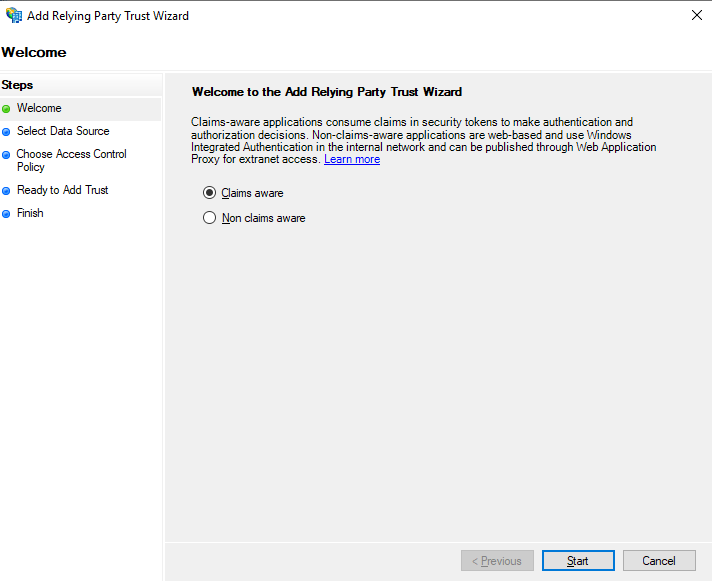
Welcome
Select Data Source
Specify Display Name
Configure Certificate (optional)
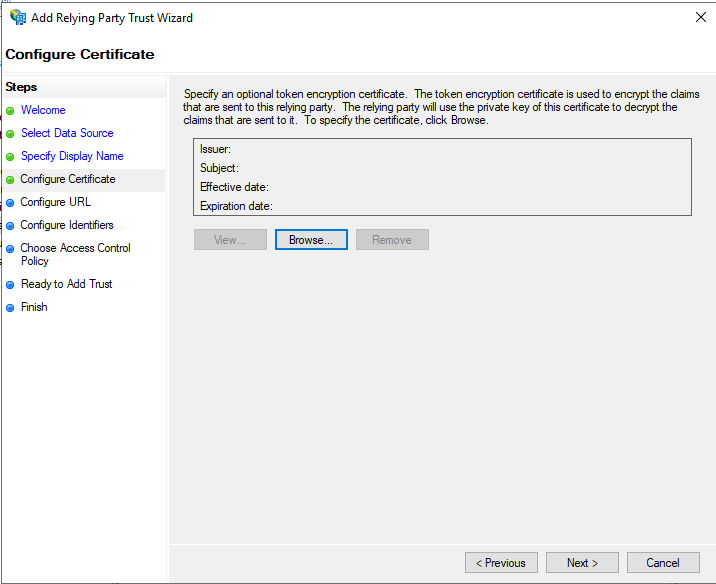
Simplelists also supports encrypted SAML Assertions.
- Select the Simplelists encryption certificate using the browse button
- click Next
NOTE: The encryption certificate is specified in the Simplelists metadata xml file. Using the file to import via the automatic method above is the easiest way to obtain the file.
NOTE 2: Encrypted assertions require that both the Response and Assertion be signed. Run the following command from powershell:
Set-ADFS-RelyingPartyTrust -targetname SimpleLists -SamlResponseSignature “MessageAndAssertion”
Configure URL
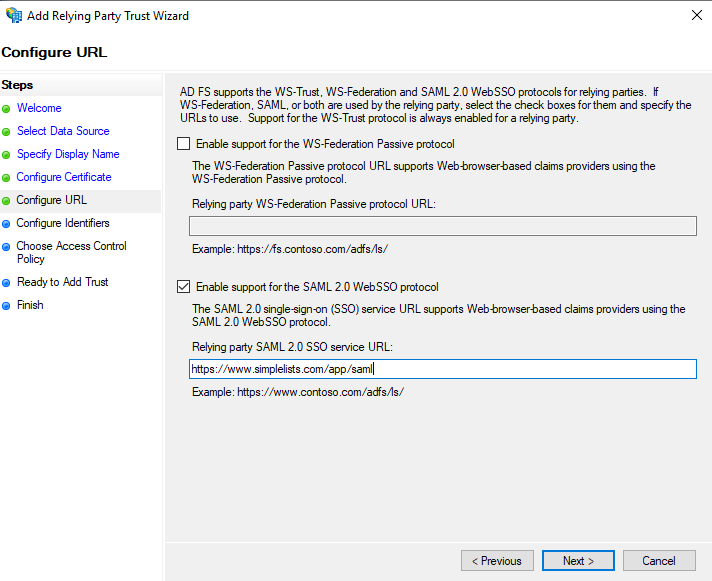
- Click Enable support for the SAML 2.0 WebSSO protocol
- Enter the Relying party SAML 2.0 SSO service URL
- Click Next
This is the Reply URL / Single Sign On URL / Recipient URL / ACS URL from simplelists. In the example above it is https://www.simplelists.com/app/saml
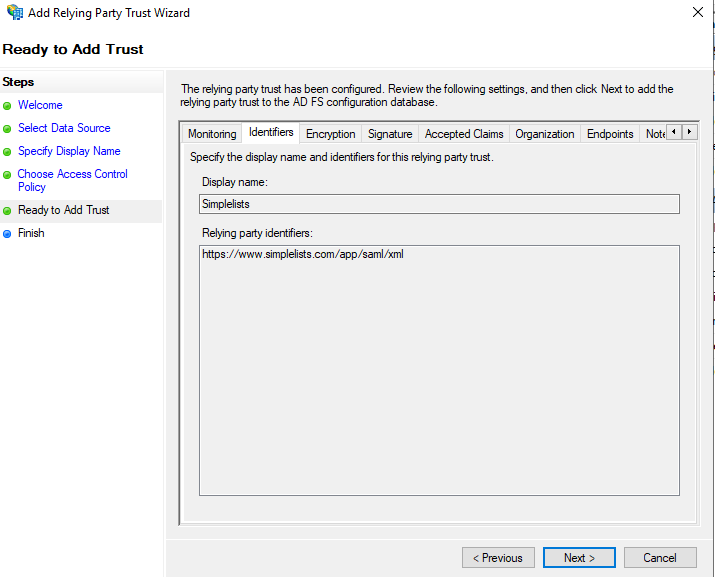
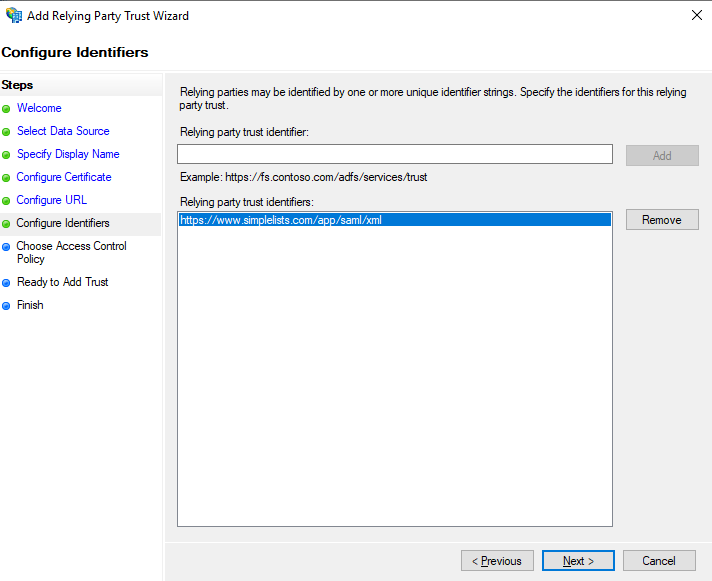
Configure Identifiers
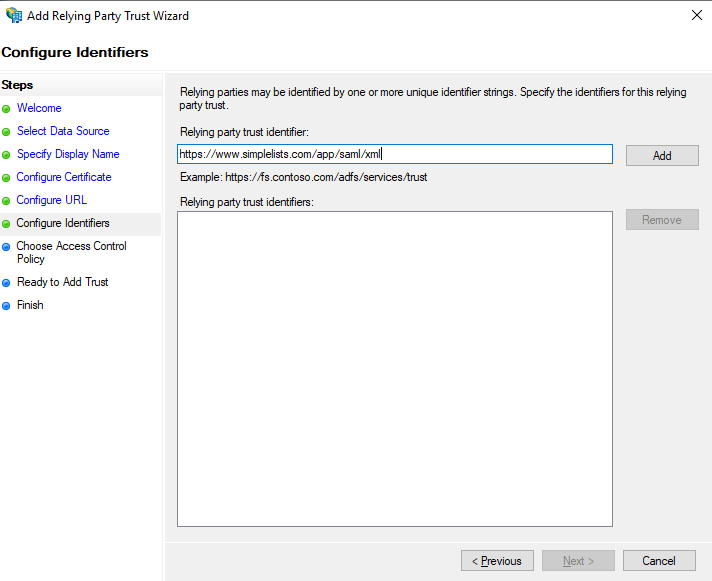
In this case it is the Entity ID from simplelists. In this example it is https://www.simplelists.com/app/saml/xml
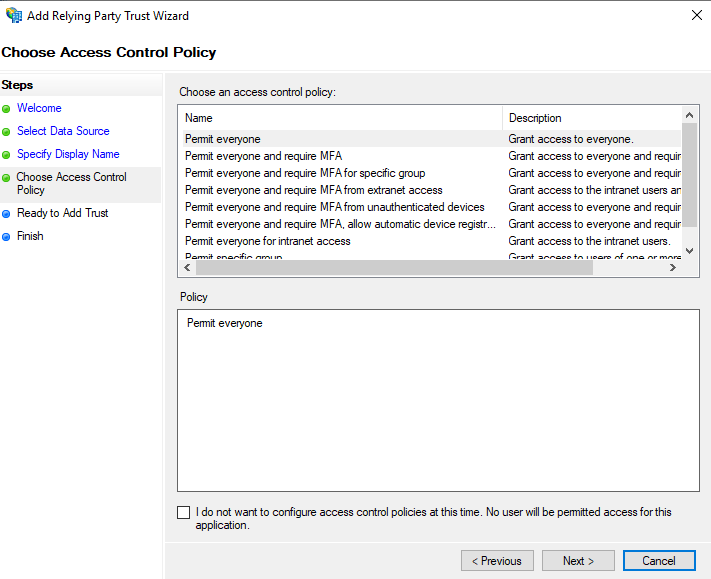
Choose Access Control Policy
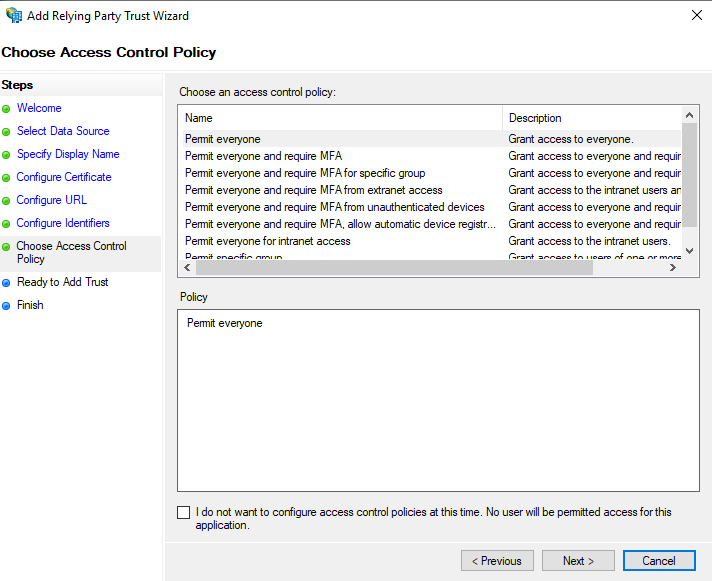
- Accept the default of Permit everyone
- Click Next
Ready to Add Trust
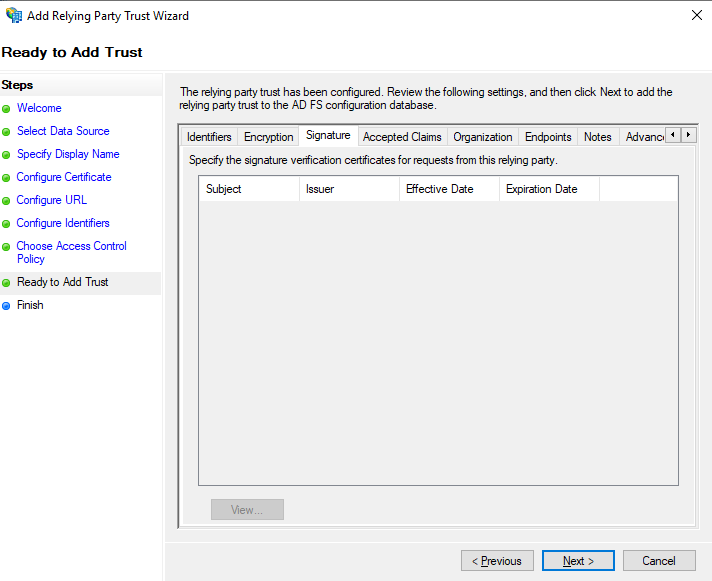
- You can review each of the settings you added on the tabs.
- Click Next if they look correct. You can change them later.
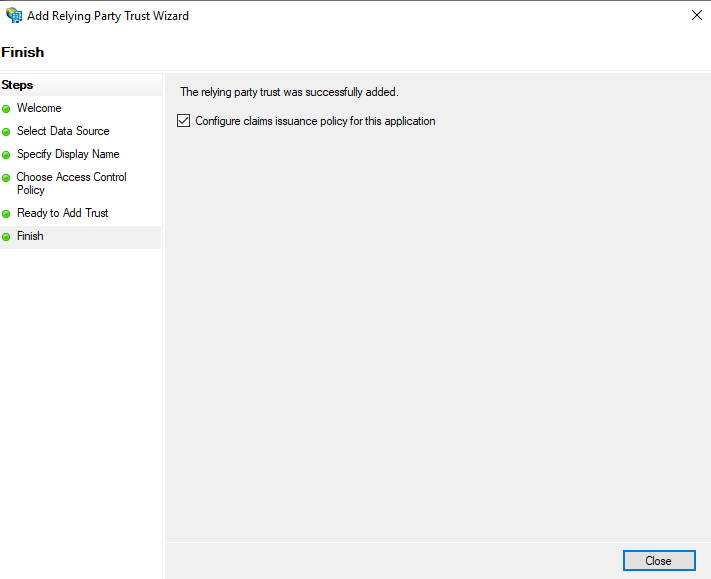
Finish
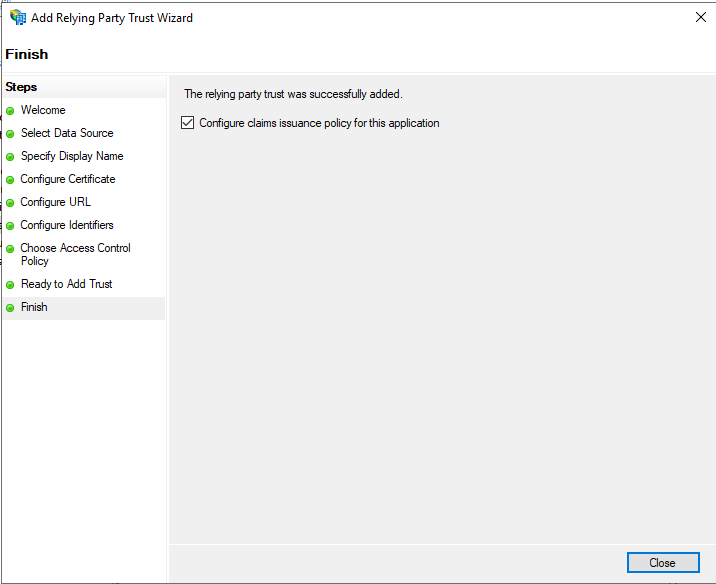
- Accept the default to Configure claims issuance policy for this application
- Click Close.
This might open up Edit claim policy for “your Relying Party Trust”
Create Microsoft ADFS Claims Issuance Policy for simplelists
The following dialog should have been displayed after you closed the Add Relying Party Trust Wizard. If it was not displayed:
- Select the Relying Party Trust that you created
- Click the Edit Claim Issuance Policy from the actions menu to the right
Create Attributes Rule
This rule specifies which attributes will be in the SAML Assertion.
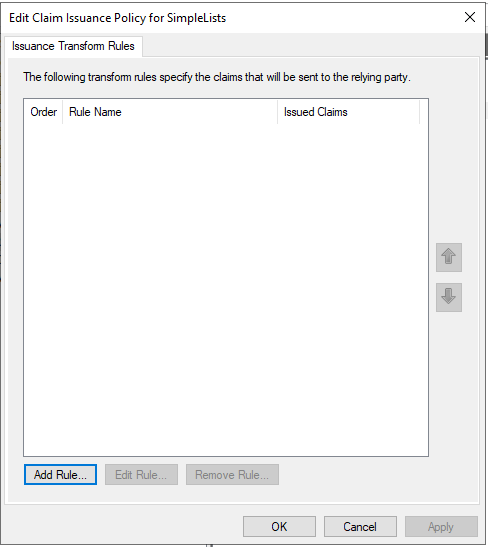
- Click the Add Rule
Choose Rule Type
Configure Rule for Attributes
- Set the Claim rule name to Attributes
- Set the Attribute store to Active Directory
- Add the LDAP Attributes and Outgoing Claim Types as shown below
| LDAP Attribute | Outgoing Claim |
| Given-Name | Given Name |
| Surname | Surname |
| E-Mail-Addresses | E-Mail Address |
| User-Principal-Name | Name ID |
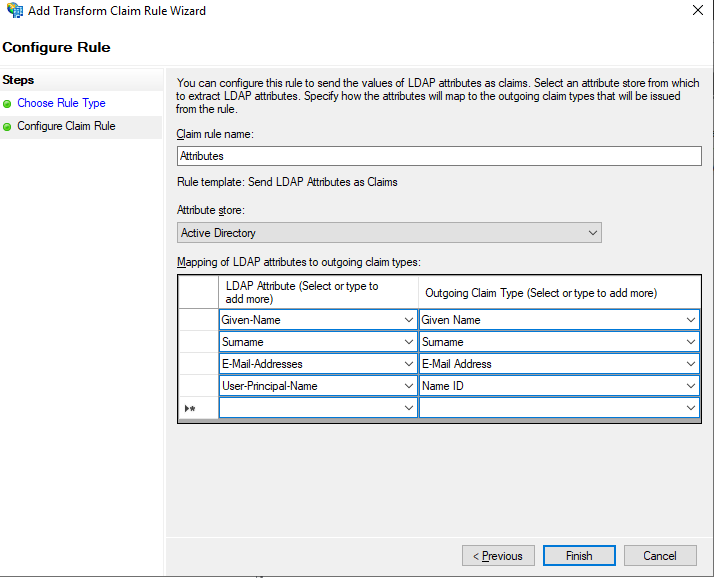
- Click Finish
Note the Given Name and Surname Outgoing Claim type selected from the Dropdown list will set the default ID values that simplelists uses to obtain the Surname and Given Name of the user from the SAML assertion.
Add Transform Incoming Claim Rule
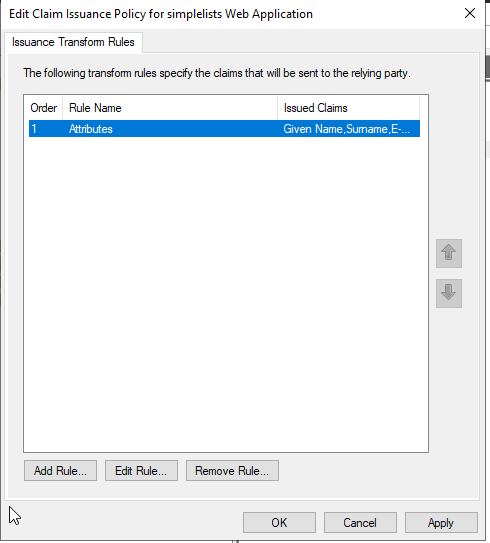
- Click Add Rule
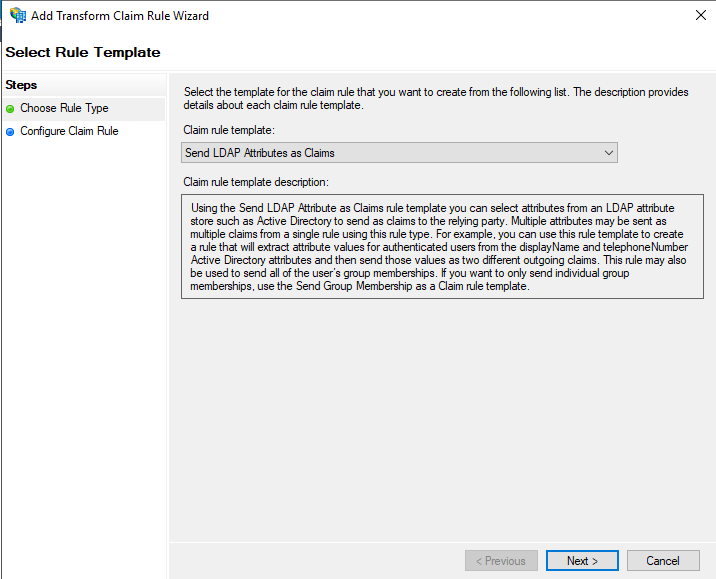
Transform an Incoming Claim
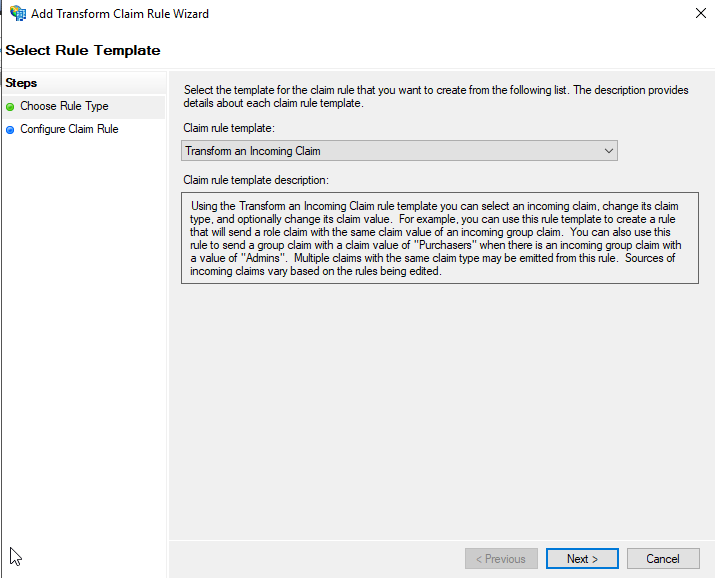
- Select the Transform an Incoming Claim for the Claim rule template.
- Click Next.
Configure Claim Rule
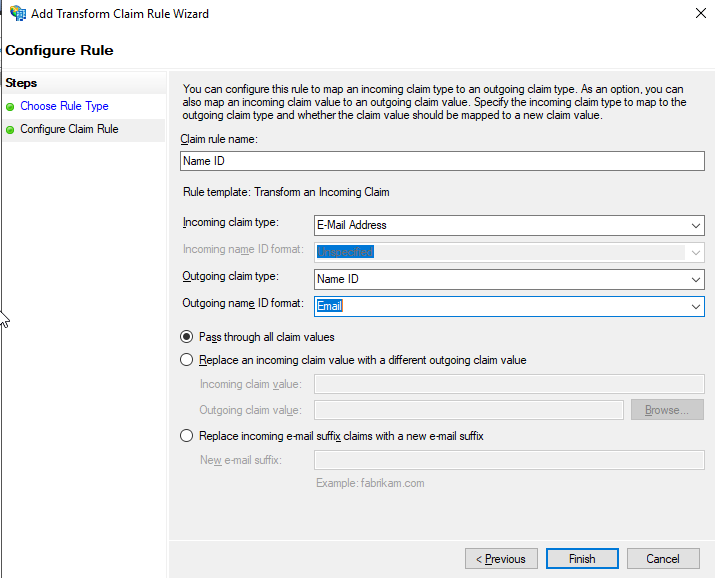
- Set the Claim rule name to Name ID
- Set the Incoming claim type to E-Mail Address
- Set the Outgoing claim type to Name ID
- Set the Outgoing name ID format to Email
- Select the default Passthrough all claim values
- Click Finish
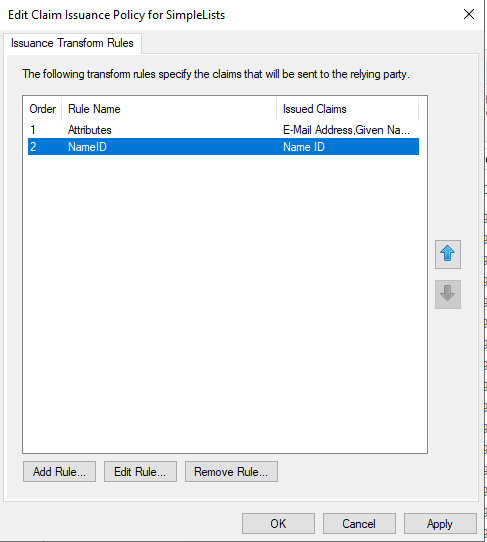
- Click OK to complete the Claim Issuance Policy
Add Signature Verification Certificate for Microsoft ADFS Relying Party (Manual Method)
By default Microsoft AD Federation Services does not allow you to import a signing verification certificate during the wizard to create a Relying Party Trust.
The Simplelists Signing Certificate can be downloaded from the Simplelists Authentication Provider settings
- Open AD FS Management
- Select your Relying Party Trust created above
- Click Properties from the right hand menu
- Select the Signature tab
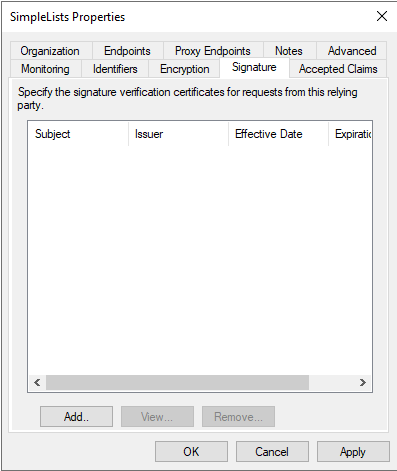
- Click the Add button
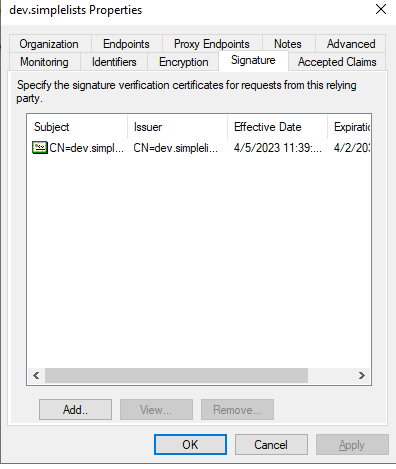
- Select the simplelists signing certificate
- Click Open
- Click OK after the certificate has been imported
Testing Login
If everything is correctly configured you will be presented with the ADFS login page.
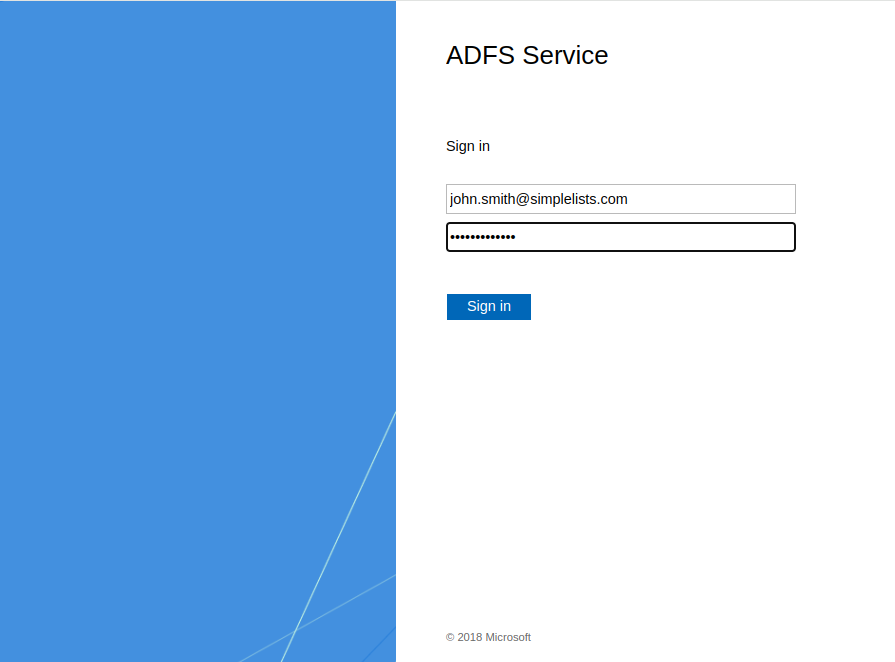
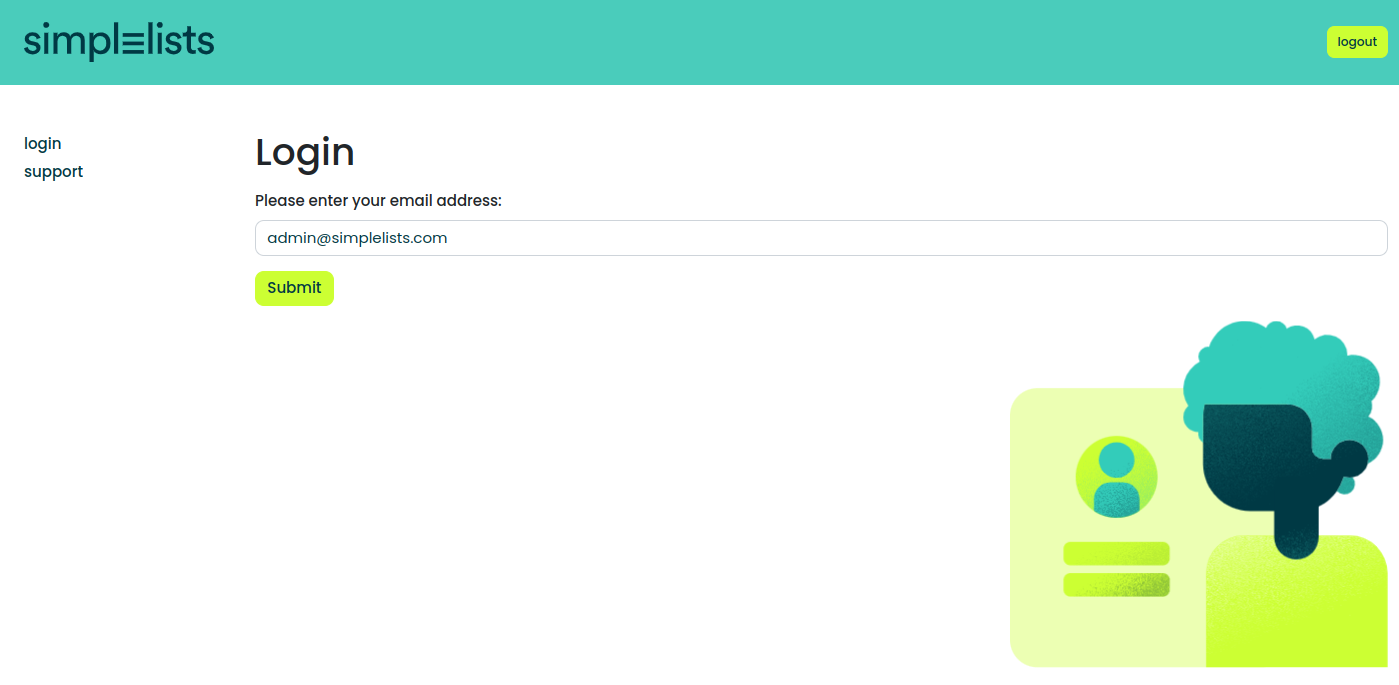
- Enter the email address that you have enabled for ADFS in simplelists
- Enter your password
- Click Sign In
Note: You should note that the page prompts for the user ID in the format "domain\user" or "user@domain" (if you enter the password incorrectly). The Transform Incoming Claim Rule that you created above is only configured for the email address. You can add another one to support other formats including Domain\user if you want to support them.

