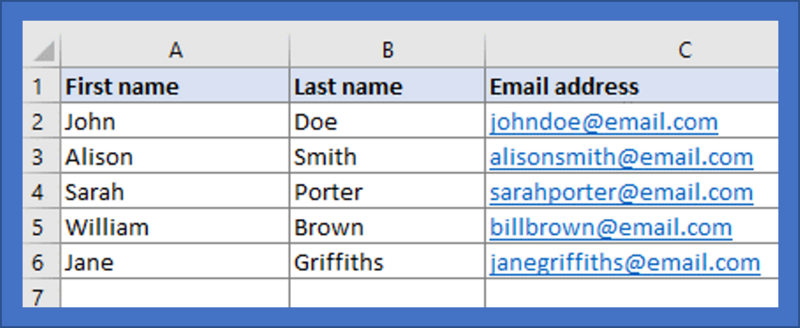
When you start to build an email list you may only have a few members. If this is the case, inputting people’s details manually via the Simplelists members area is straightforward. When your list starts to grow, you may find it helpful to add a large number of subscribers at one time, from a spreadsheet. It is also useful to have a spreadsheet copy of all your list members for your own records. In this short post, we explain how to add members to your list from a spreadsheet.

Prepare the spreadsheet
First, open your spreadsheet. Your spreadsheet only needs three columns:
- First name
- Last name
- Email address
Save as a .csv file
Save the file as a .csv file type using the 'Save As’ dialog box in your spreadsheet program. You may be asked if you are that you wish to save as a .csv file. Just select 'OK’ or 'Yes’ when asked. Remember where you save your file.
Upload to Simplelists
Finally, you want to upload the file to Simplelists. Log in to Simplelists and select the 'List members’ page. Click on the 'Upload file’ tab and search for the file that you saved earlier. Make sure that 'comma separated’ is chosen in the drop-down menu on the 'Upload file’ page in Simplelists. Then, click 'Next’.
On the next screen (’Select fields’), select the correct field name for each column of the file (First name, Last name, Email address, etc.). Then, click 'Next’.
The next screen will show you some 'Upload options’ which you can choose to select or not:- By default an entry’s name will be updated when the email address matches an entry already in your address book. If you would also like to update the email address if the full name matches then please check this box.
- Send confirmation requests to all addresses uploaded (except those already in the address book and already confirmed).
- Delete current address book entries that are not in uploaded file.
You can also watch a short video of these instructions in an earlier post on our blog.
